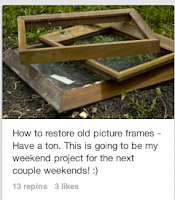
Project #2
It could be because I’m engaged, or maybe just because I
like to try things I see, but the project for this was
restoring/remodeling/redoing a picture frame.
If I told someone that I did this project strictly for the fact that it
looked fun that would be a complete lie- it wasn’t all that fun or
challenging. The real reason why I chose
this project? Because I wanted to buy
some power tools.
 Before I go on to explain the steps of this project and
whether or not it turned out the way it is claimed to turn out, let me share a
little story. I have been working at a
home this past summer doing yard work/gardening/landscaping (whatever sounds
most professional works fine) when I started to realize how many awesome big
boy toys the owner of the house had.
Realizing that I’m in the position where I’m making some money (emphasis
on “some”) I figured that I too should begin my own supply of big boy
toys. I figured that the best place for
buying this ‘tools’ would be Home Depot or a store similar to that right? Wrong.
Completely wrong. If you’re young
and not all that rich like me, the place you need/should go is the pawn
shop. That place is literally like going
into the garage of all my neighbors in my hometown and having anything I could
ever want. You need a picture of the
Beetles? They’ve got it. Need a gun?
They’ve got it. How about an
alarm clock, camera, toilet seat,
stereo, staple gun, or power sander?
They’ve got it. What about a
wedding ring? They’ve got it and I
actually bought one that my fiancé is wearing right now, but that’s another
story for a different blog. Point of the
story- if you need inexpensive tools and are fine that they have been used, go
to the pawn shop my friend!
Now, back to the steps of how to make your dull and
ridiculous frame look fresh and new.
Getting Started
To get started I went down to dumpster and found this old
picture frame. I actually knew the
previous owner of it…don’t think that ‘they’ know I have it! I got the sander from the pawn shop and some
sand paper from the Home Depot
·
Old picture frame- free
·
Hand power sander $25.00
·
Sandpaper $3.96 (for a sheet of three)
Step 1
 Before you can get started on this project you need to find
a frame that is made of wood and has been painted. I prefer a frame that is flat and not curvy
(i.e. a router has been used to make the sides) so that a normal sander can
easily remove the paint.
Step 2
While keeping the frame firmly on the ground (I crouched on
the ground and held it down with one of my feet) sand the paint of the
frame. It takes a minute or two to break
through the first part of the paint but once it comes off the rest of the paint
follows along with some effort. When
the paint has come off and you are left with only the bare wood exposed, make
sure that you are sanding along with direction of the grain instead of cross
grained. This will help the wood keep a
good look.
Step 3
When the sanding is complete, use any type of stain you
choose. There are lighter stains that
look good on lighter colored wood, often leaving the natural coloring of the
wood, or you can go with a darker stain to match the colors of your cabinets or
furniture etc.
Helpful Hints
I found it helpful to use a 60-grained sand paper to easily
and quickly remove the paint. Anything
higher than this grain will probably leave you sanding your frame for a longer
time, but will result in the sanded frame feeling more smooth than the 60-grain
piece.


