Tuesday, December 17, 2013

Project #9

Time out from life

This week has been nuts, seriously.  I have my finals, projects, family coming into town and a wedding.  I figured that since it was so crazy, I would have a blast from the past post of something that I wrote a few years ago while in Jerusalem.  For those who have been there...I loved it.  For those thinking about going...do it.  

Somewhere Near Along Time Ago


When the blaring horns all around me sound,
I find myself sheltered in a most holy ground.
Where a sacred prayer was offered to up above,
A witness of an eternal love.
Somewhere near here, sometime long ago,
My Savior pled and bled and transcended far below,
Any sin of mine, or any mistake I've done.
So my soul would heal and leave my sins undone.
Somewhere near here, sometime long ago,
My Savior died, just to save my soul.


Never thought that I would love poetry so much, but I really do enjoy writing when I get the chance!  

Thursday, December 5, 2013

Project #8 Engagement


26 Years

In only 16 days I'm going to be married.  26 years of wondering what she looks like, 26 years of trying to develop myself into the man of her dreams, 26 looong years of celibacy and self restraint, 26 years of self discovery and deep reflections on my own weaknesses and trying to make them strengths...26 years, 9,525 days, 228,617 hours or 13,717037 minutes I have lived a single man, but not any more. Now it's time to turn this one-man show into a team. 

I have talked about being engaged and shared a few things about my most wonderful fiancé but have yet to show a picture or talk about her in any way (rude I know).  Well, this blog is dedicated to that girl, the girl who will share my last name in this life, the girl who makes me smile more crazy than anything else I've ever loved in my life, a girl who makes everyday feel like my birthday, Christmas and graduation combined into one grand and glorious day.  This blog, however, isn't dedicated to the girl of my dreams- because honestly- there is no way any girl in my dreams could ever be as great and wonderful as my Sarah bear.  

Meet My Sarah

Sarah isn't your average Sarah.  Her favorite color isn't pink, her favorite activity isn't shopping or discussing the party last weekend.  She didn't dress up as a princess as a little girl but spent time catching lizards in the canal in her backyard. You won't find any shellack or finger nail polish on her nails, but you may find some dirt under them.  Her hands wouldn't win any awards for being the most soft, but those same hands bring the softest stroke with each tender touch.  Her most beautiful look is accomplished in about 10 minutes: a quick shower followed by drying her hair out by holding it out the car window, finishing it off by glazing those most succulent lips with a touch of chap stick.  Her laugh sounds like the babbling mountain brook and her voice turns even the most melodious birds mute.  Her kind and tender heart are the most forgiving and understanding I've known out side my own mother's.  Yes, Sarah is definitely not your average Sara, she's so much more.  

So how did I end up tricking this girl into becoming my bride?  Great question- and I give all the credit to Roger and Hemmerstein. If it hadn't been for the musical Seven Brides for Seven Brothers I'm sure that I would be out in the dark and dreary world, forever searching, never finding.  After spending 7 kiss-less but equally fun and adventurous weeks rock climbing, reading, dancing and cooking up various concoctions, Sarah and I took a trip to St. George to enjoy the heat of the sun before my last semester of school.  The trip went perfectly, literally in every sense.  My parent's loved her more than I did at the time, my little sister took her in as her own sister, we climbed, we explored, we watched Seven Brides for Seven Brothers AND we kissed.  Yes we surely did and oh what a kiss it was.  I would later find out that she had given up on the idea of me kissing her because we had gone 7 fruitless weeks without more than a hug.  But there must have been something in that movie that really got the mood right and the emotions running because when we kissed...a whole avalanche of emotions came right along with it.  

Four Months Later

We decided that we would date for four months.  Actually, we didn't ever intend on dating at all, but we figured that we liked spending time more with each other than with anyone else, so we dated for four months before making the best decision ever- get married.  I'm sure that she knew before I knew, but I wanted to make sure that she was positive about her decision before I asked ... yeah right!  I had played around with her plenty of times, dropping my keys onto the ground and 'kneeling down' to pick them up while calling out so she would see me bending down as if I was going to propose.  These jokes never stopped playing a funny note, so naturally I kept doing them while building up the actual courage to do it the right way.  It happened while on the moon light chair lift ride at the Sundance Ski Resort.  The air was warm and filled with the music of Michael Buble, Frank Sinatra, Taylor Swift and even Bobby Knight.  Classic way to set the tone for a classic night.  I brought some snacks and snapped a glow stick or two to add to the general ambience for this mid summer night's dream.  I gave her a journal, detailing my love and adoration for her and then let her see the small hole I had punched into the journal (the perfect place for a ring), only to discover that there wasn't a ring in it, but just a drawing of a sarcastic winking face.  She then looked up with that look of "funny Taylor...reeeeally funny ya dork" only to see me holding a ring and breathlessly asking her if she would be my wife.  Words weren't needed to know her answer, it was written all over that beautiful smile on her beautiful face.  "Of course" was all she could say and of course that was all I needed to hear.  

Four Months Even Later

16 days is all that's left until that blessed day of marriage.  16 days until my best friend and I get to move in with each other and start a lifetime of making the best and most hilarious memories with each other.  Speed bumps will surely attempt to slow us down, and they might, but that doesn't mean they will stop us.  No way, this team is too determined and too stubborn to allow that to happen.  16 days and all the 26 years of preparation and patience will pay off.  16 more days until the rest of eternity gets to finally start.- Hallelujah.  

Even though our wedding is in just 16 days, I still don't feel like it's real.  A part of me feels like it's pretend; fake invitations, fake engagement, fake wedding plans and fake conversation, but the feelings of love for my Sarah?  Yeah, those are for real.  They are more real and true now than they were four months ago when I asked her to be my wife.  They are definitely more real than the time when I asked her to go rock climbing and have share some dinner.  The feelings for love are more real than the first time I saw her, nearly two years ago when she didn't even know I was human sharing the same oxygen with her at church.  Those feelings for love, for a desire to care for her, feeling of concern and respect have never felt so deep in our entire career and the good thing is, they will only get deeper as time goes on.  Truly, Sarah plus Taylor equals happiness.  

16 days is all that's left
Until she becomes my wife,
16 days two hearts bereft
But soon will start a new life.

16 days will count on down
Until those days become one, 
And hand in hand we'll gaily bound
And off into the sunset we'll run. 


I love you my Sarah Bear!


Saturday, November 9, 2013

Project #7 DIY Pallet Shelf

Bad Breakfast Make-Up

My attempt at making my brother crock-pot French toast failed miserably.  No possible amount of syrup or butter could mask the taste of burnt bread, and no amount of air freshener could mask the smell of burnt food in our apartment.  I clearly owed him something for my disaster  

After looking through his room (I think that I found all the missing dress socks that magically appeared in his drawers), I noticed that he has about 5 Qualtrics hats and 10 BYU hats just laying on the top of his drawer.  I had made a make-shift holder to hold his hats, but I figured that since I wanted to do something with wood again, I would make him some pallet shelfs.  And, when I get married this December, they all might just end up magically in my home. 

Step #1 Break Down the Pallet

There have been tons of pins on Pinterest about how to easily and effectively take apart a Pallet.  The pins with the highest re-pin count all include using a sawzall and I would highly recommend making the investment and buying one.  I would show you a picture of mine, but seeing that all my money is being used for my marriage and taking my fiance on dates...I haven't bought one yet.  Just do as I say, not as I do! 

You can use any type of pallet that you want, but you also want to make sure that you have the same length of planks for your shelfs.  

Step #2 Measure the Space for Your Shelf

The first shelf that I attempted looked really good, but it wasn't functional because I didn't make the right measurements.  After making sure that I had the right length of planks, I used some smaller pieces of wood to hold them together.  I casually nailed them in the wood, not realizing that metal holders on the wall would be interfered by the pieces of wood under the planks.  Just make sure that you know where the shelfs will be and that they will work out.  The easiest way to do this is by measuring in from both ends the length that the 'locking ties' need to be.

Step #3 Cut Your Locking Ties

Your locking ties are the pieces of wood that are located underneath the long planks of wood.  These pieces are what keeps your other planks together.  The easiest way to do this is by designating one plank for cutting into smaller locking ties.  If you cut two pieces for each shelf you will have plenty of locking ties to hold the planks together.  When cutting the shelfs, to insure you have the right size, measure from the wall where your shelfs will be hanging how far they will be hanging from the wall.  This will keep you from hating your life, burning your shelf or doing something that could get you thrown in jail.  Just sayin

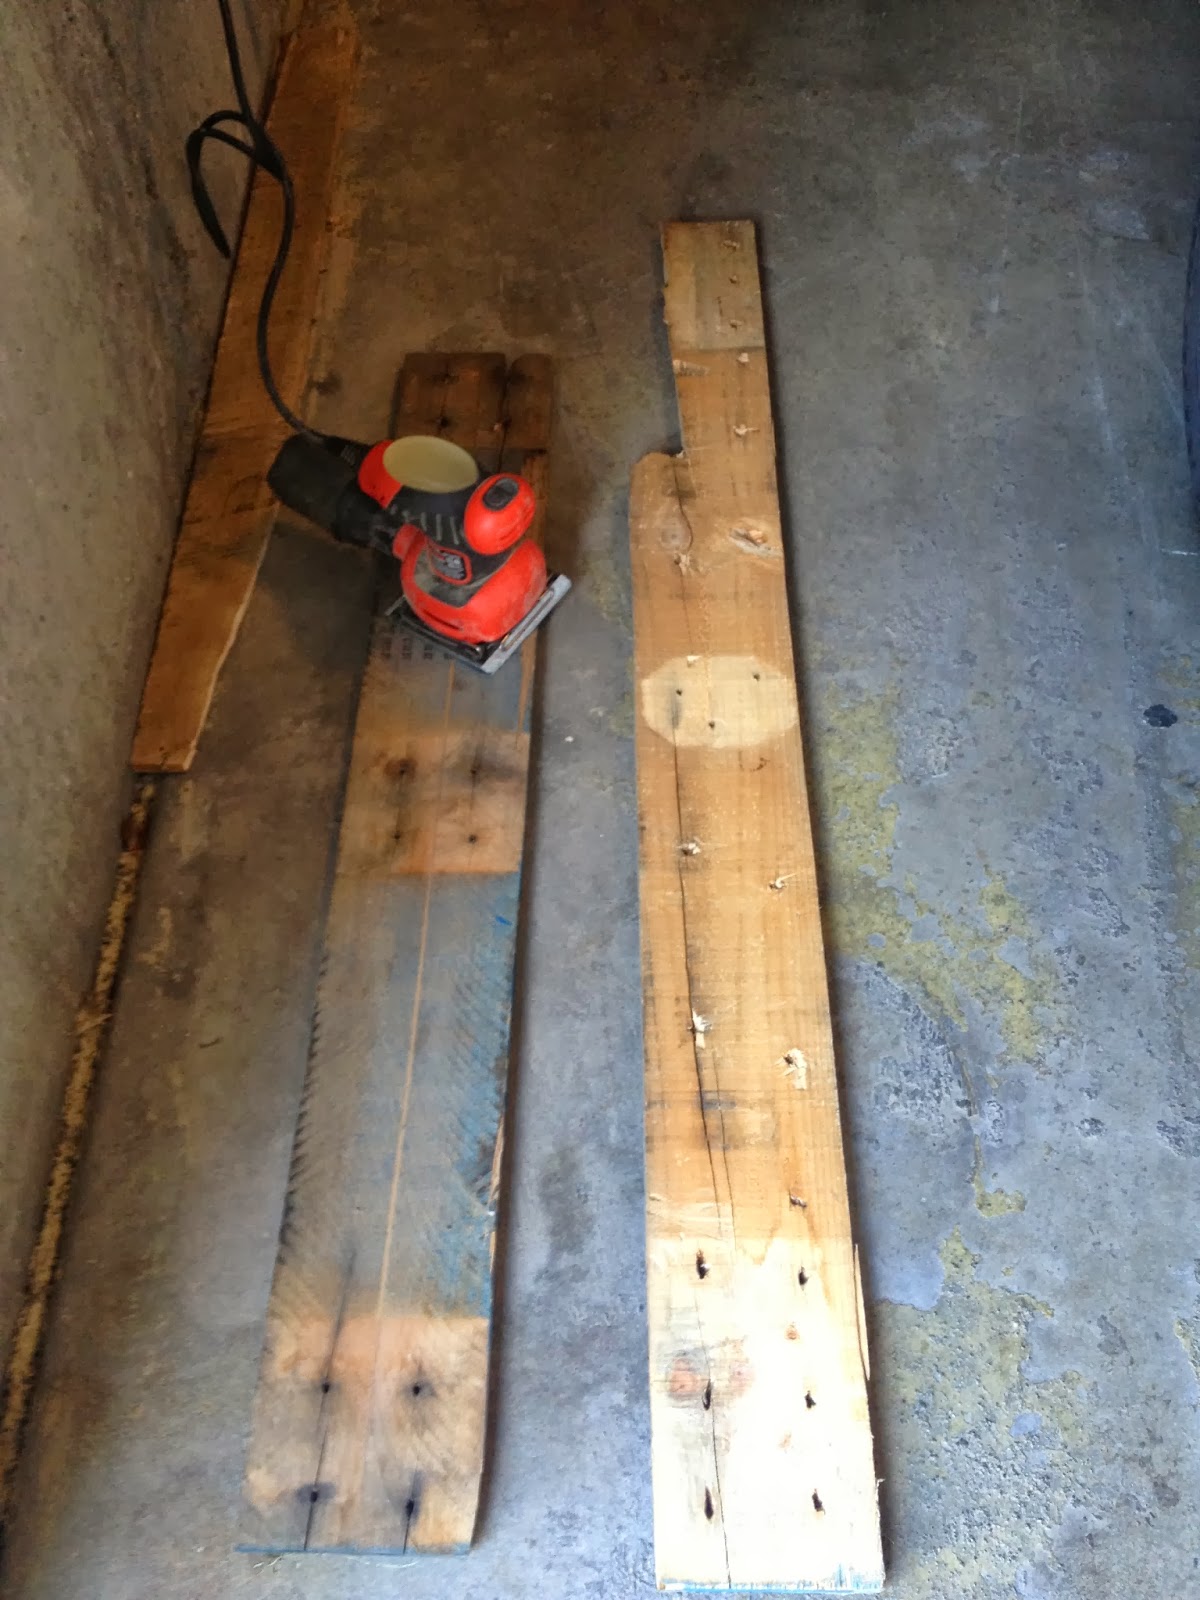
Step #4 Sand Planks for Shelfs

I knew that I was planning on having my brother put his hats on the shelfs, but there was no way in this happy valley that I was going to risk the chance of his football hands from getting a sliver.  Plank wood isn't the most forgiving wood in the world.  Although I didn't sand the wood down entirely so it felt like the cheeks on the face of my dearest love, they were sanded down enough so a hand could safely glide over the long plank of pallet goodness.  

Step #5 Nail Locking Ties into Planks

This step may sound remedial and I'm only adding it because I learned the hard way that there is a right way and a wrong way to nailing the locking ties into the main shelf.  First, you want to make sure that you have the right amount of wood for your shelfs,  I used three planks for one shelf and found out that one pallet can make about 4 shelfs.  I used two locking ties for each shelf and had ample wood from one shelf.  No the big part- the nails.  You will want to nail from the top to the bottom (top of the shelf towards the bottom) so that the extra nail which isn't covered by wood, comes out the bottom of the shelf and not out through the top.  If you have a dremmel or even some wire cutters so you can clip the excess nails. 

Step #6 Repeal Obama-Care

I highly doubt there are those who actually read my blog, but I like to invest my time in writing about what I love and what I feel passionate about.  Sooo basically, I hate the idea of giving our government control of something that makes up 1/6th of our GDP; healthcare.  The strongest supporters for this new bill are those who don't realize the impact that it will have on EVERY American.  Even though Obama claimed that 'if you like the plan you are on now, you will be able to keep that plan' his words were as vague as his current hair color.  All employs at REI will lose their health benefits. There are countless other companies who will suffer the same consequences.  Furthermore, to get coverage from the new plans offered by our President, we have to go through a website that functions about as good as Obama speaking with Vladimir Putin.  Doesn't work, won't work, get it out.

Step #7 Bequeath the Shelfs to Your Brother

After you have sanded your planks, nailed your locking ties into your shelfs and feel great about your self, it is time to present it to your brother.  Since he wasn't home, I put up his shelfs and hats.

What I would do different

If I was making these shelfs again, I would make sure that all the shelfs were the same length and could fit into a frame for a book case or some other type of closet.  I have thought about making a simple closet out of a few 2x4's where the shelfs can be taken out or added depending on what you need.  I'm sure that I'll make one of these one day (as soon as Obama Care is repealed) and make a great post about it!  


Wednesday, October 30, 2013

Project # 6 Crockpot Breakfast

Breakfast for my brother

Being engaged has taught me so many things I never imagined; patience to wait for the perfect outfit to be ready, enjoying a truly delicious meal that wasn't nuked in the microwave for two minutes, enjoying the smell of sweet perfume worn by the most beautiful girl in the world and planning a future with the one I love.  I had no idea such things like shellac, tampons and yoga pants were so important...no sir.  

Before all these feminine fancies were introduced to me, I lived a peaceful and simple life with my brother.  Although he is only a year and a half younger than I, we are one and the same.  Since the day we both learned how to ride a bike on the hot asphalt of St. George we were always doing things together.  

Our particular bro-mance is something quite unique.  My younger brother and I are fortunate enough to have an older brother who we both dearly love, but because he chose to break my remote-control car (he said he was going to turn it into a go cart that I could ride on) when I was 7 married 5 months after I returned from my mission in Russia, I realized that my brother-hood team would have to be Batman and Robin instead of the Three Stooges. 

My younger brother and I, who I will tenderly call Kiki", did everything together.  While riding our bikes, we would pretend that we were the two bike cops from Chips.  I would tell him that he could be the white cop who had a super fast motorcycle and I would be the black cop.  The real reason I chose to be him was because I wanted to have the gun verses the night stick that Kiki had.   When traveling with our parents to General Conference, restaurants or wherever, we would ALWAYS talk to each other with British accents so others would think that we were international and want to talk to use.  We made an extra effort to do this around cute girls...and the shirk away when they actually started to talk to us. 

All of this is to give background to understanding why I chose my latest Pinterest Project.  Because Kiki and I have lived with each other for the past 3 years, and because I feel slightly responsible to keep him healthy so he can perform well on the BYU Football field, I decided to make him breakfast before his big game.  Naturally I went to Pinterest to scout out some different recipes that are tailored for breakfast and found this recipe.

The recipe was so easy and I even bought twice the amount of ingredients so I could make some for my fiancé that Sunday for breakfast.  I mixed the eggs, milk, cinnamon, vanilla and then poured it onto the honey oat bread inside the Crockpot.  I made sure to do this in the evening so that he would wake up in the morning and smell the cinnamon and vanilla soaked breakfast.  Yeah...didn't happen.  

When I woke up I could smell the french toast wafting into my room.  I was excited that I was up before my brother and would be able  to get breakfast prepared and ready before he woke up.  After entering the kitchen however, that all changed.  

I hesitantly opened the Crockpot and and immediately noticed that it wasn't anything like the french toast I had dreamt of the night before.  The top was a little black, texture like dead skin and the smell....burnt.  How could my Pinterest recipe let me down?!  I was so confident in my pinning abilities and sure that the recipe would be a huge hit- neighbors would come running to try a small morsel of the heavenly fluff!  Surely my fiancé would be all the more confident in her decision for me to be her husband...but after this fr%nch toast? Not a chance!  

After I flung the piece french dunk out my front door (it's still rotting somewhere in our apartment complex) I made my brother a peanut butter and honey sandwich and wished him luck at his game.


Tuesday, October 15, 2013

Project #5 DIY 'Love-Language Board'

The Language of Love

My fiancee is practically perfect in so many ways: her smile makes me blush, her eyes twinkle like a little star, her laughter fills me with a rush of giddiness, her voice soothes my heart and her touch makes me melt.  She is like the sunshine that breaks over the tall mountain to the east in the mornings, spilling happiness and warmth over everything its rays touch. She works harder than any of my brother's football-star friends and can find the hiding sun on a rainy and cloudy day.  Yes, she is practically perfect . . . practically.   The one set-back (emphasis on ONE) she has is a difficulty keeping track of her keys, wild flowers and love notes.  Because I'm meticulous when it comes to being punctual, I wanted to create something to help her stay organized and minimize the time she loses looking for keys etc.  Thus I created the 'love-language board' to help keep track of wild flowers, love notes and keys to her heart. . . 

Getting Started

There were a few more materials than normal because of the different things I wanted to do with the love board.  I went to Michael's and got all the materials which included the following
  • Cork Board (Purchased a pack of 4 12x12')
  • Medium Cloth Pins (one pack had about 15)
  • Pack of Craft Nails (it came in a packet of 1.5' 1' and .5' nails)
  • Paint 
  • Stencils
  • One small pine branch (about 1' or .5' in circumference)
In all, I paid about $20.00 for all the materials.  I would recommend buying everything but your cork board first, then use the receipt which gives you a 40% discount and purchase the $12.00 board.  

Step One

Choose your board- Before you get underway on your board, you want to make sure that you have a good sized board to work with.  I used a full length board that was about 3 feet long and 6 inches wide.  This will give you plenty of room to work in your cork board as well as some room for your clothe pins.  Sand down your board depending on how rough want your board.  I sanded mine to the point that it wouldn't give me slivers if I rubbed my hand across it, but you can do whatever the junk you want!

Step Two

Determine orientation of your board- I wish I would have thought of this before, but for this step you will want to determine which orientation you want for your board.  If you want it to hang parallel with your door, wall or wherever you hang it, you will want to make sure that the following steps agree with the orientation of your board.  This will make more sense in the following steps. 

Step Three

Add the cork board- Depending on how big you want your cork board to be (I had to make sure that mine was SUPER big due to the amount of love notes my fiancé receives) will determine how much space you'll need reserve for your board.  I double layered the cork board so the pins would only sink into the cork and not the wood.  Apply a few strips of Wood Glue like jelly on a PBJ to have the two cork boards stick together.  Apply a few more strips of glue on the back side of the board and then apply directly onto the board.  Put a nail in each corner of the cork board and also in the middle to keep the board secure on the wood 

Step Four

Paint your dreams- I used a stencil with butterflies and wild flowers because the love of my life is literally the human form of a wild flower.  Her natural beauty like a cloudless summer night, or happiness that spreads to all those around her, her gentle and tranquilizing scent or softness and grace are the pure personification of a wild flower.  Her spirit floats on the charity she feels for her fellowman like the air on the wings of a butterfly. After the paint dries, nail in a few nails either at a 45 degree angle or whatever will help keep keys up against the board.  

Step Five

Glue your clothe pins on- I used seven pins evenly spaced to hold wild flowers.  I applied a generous amount Wood Glue to the back of the pins to keep them firmly in place.  Determine how far from from the top you want your flowers to hang and then apply a clothe pin.  Continue to place your clothe pins from your designated height from the top of your board until you come to the nails in the center.  Allow plenty of time for the pins to dry on the board.  


Step Six


Make your push pins-
 To make my push pins, I went to a local park and cut of the branch of a Pine Tree.  It wasn't too thick, about the same diameter as a dime which worked perfectly with the nails.  I also used a PVC pipe cutter to clip little 1' clippings for the push pins.  After you have clipped a as many small pieces of pine as you desire, take a .5' nail and push it through the middle of the pine.  If your pine branch is fresh this process will be super easy, no hammer required. 


Step Seven


Hang your board- I nailed two nails towards the edges of my board so that a copper wire would pull against the nails supporting the board in place. Pretty simple...but if you need more ideas for this then I wish you all the best.


In hindsight, I wish that I would have made one board that could hang parallel (up and down verses sideways) with the door or on another wall.  This would save space and make the walls look more clean and space oriented.  My fiancé loved the board and although she doesn't use it the way I would love her to, she did put the spare key, two roses and my love notes on the board and has them in her room :)  As my father in law once told me, "A happy wife makes a happy life!" so true...

Saturday, October 12, 2013

Sneak Peak at Project #5

Project #5 "Love-Languages Board" 


Here's a look at what I will be posting for next weeks project!  Made this 'love-languages board' for my fiancé to help her keep track of her keys, notes and wild flowers.  She loved it...and I kinda wanted to take it back and use it for myself ;)

Friday, October 11, 2013

Project #4 DIY Dish Rack


My Own Dish Rack

Before I get started with instructions on my latest project, I have to share a few hilarious words.  I live with two of the best people in the world (come December 14th, I'll have the BEST roommate of course), my brother and best bud Luke.  My brother plays for the BYU Football team which is simply fantastic and my roommate Luke plays for the BYU co-ed dating team, some-what fantastic.  When friends for either roommate come over to our house, they almost always comment about the different crafts: dish-drying rack, grow box with fall foliage or the banan-A-frame. Comments from friend's of my brother are usually something like "uh, did your girlfriend make that?" to which I usually just make a mad dash to the bathroom.  Comments from Luke's lady friends are something like "Oh my gosh!!  Did you REALLY make those?!" . . . to which I make no reply.  The only comments I really care about are the ones from my fiancé, "That's great Taylor."  Just something to think about :) 

Getting Started

After working on my grow boxes (see below) I saw another project on Pinterest that I thought I would 'tailor' to my own needs.  Although dishes in our apartment are nothing as bad as other apartments I have been in (dishes so high that even poor fruit flies experience altitude sickness trying to fly to the top of the pile), we desperately needed a drying rack for our dishes.  

The materials for the dish rack were pretty basic, most of them I had already accumulated from past projects.
  • Mod Podge 
  • 3 ft dowels (I bought four dowels = plenty from Home Depot) 
  • Box of 1 3/4 (4.45 cm 'Grip Right' nails also from Home Depot)
  • Helmsman Water Repellant (two cans worked perfectly
Step One

If you have left over scrap wood from previous projects, use those.  If finding a new pallet and breaking it down, sanding your planks of wood and cutting them is required, then good for you.  I used the same wood from my other projects and found that two planks were plenty for the 1'x2' drying racks I made.  Before going on with the project, measure the length of the area you want to put your drying rack so it's a perfect fit. 

Step Two


After figuring out the dimensions for your drying rack, you'll need to drill holes through which your dowels will go in order to hold your dishes up right.  My first attempt at the drying rack left me with holes that were drilled in the center of the wood.  If you want your dishes to fall over then this is exactly what you should do, but if you want them to stand upright and positioned so they can really dry then drill holes about 1/2 inch from the top of your sides.   I drilled the holes with both planks on top of each other so that the dowels would line up perfectly and they did!  Small miracle :)   I drilled five holes from the back one inch apart and then I drilled an addition hole about .5 inches from the front so I could have a place for silverware etc.  
Step Three


After drilling your holes, you'll want to nail the box together.  I found it super helpful to nail one end piece to the side piece and then nail your two pieces together.  This probably makes no sense, but do whatever feels best ... as long it's legal.  Notice how there is no bottom?  I did this on purpose because I wanted to just have a towel under the box and not a piece of wood that could get moldy and gross.  

Step Four

When the box has been nailed together.  Coat each dowel with the Helmsman repellant.  This was an idea I had while watching water seep into the cement as a child in excruciating heat of St. George.  If you want your dishes to dry, and the dowels to keep from molding, then give them a good coat of the repellant.  When the dowels of been water-proofed, dip each end in Mod Podge and slide them through the holes, allowing time for the glue to dry.  

Step Five


When the repellant and Mod Podge have all dried, place your drying rack on top of a towel next to your sink!  It's just that easy!  

It would be a good idea to make sure you have the right size of drill for the dowels.  This will save you frustration when you attempt to put a dowel into a hole that is much to small.  I also found it helpful to wipe the box with some Pine Sol (on the outside of the box) to give it a nice scent and look after the box was dried.