Tuesday, October 15, 2013

Project #5 DIY 'Love-Language Board'

The Language of Love

My fiancee is practically perfect in so many ways: her smile makes me blush, her eyes twinkle like a little star, her laughter fills me with a rush of giddiness, her voice soothes my heart and her touch makes me melt.  She is like the sunshine that breaks over the tall mountain to the east in the mornings, spilling happiness and warmth over everything its rays touch. She works harder than any of my brother's football-star friends and can find the hiding sun on a rainy and cloudy day.  Yes, she is practically perfect . . . practically.   The one set-back (emphasis on ONE) she has is a difficulty keeping track of her keys, wild flowers and love notes.  Because I'm meticulous when it comes to being punctual, I wanted to create something to help her stay organized and minimize the time she loses looking for keys etc.  Thus I created the 'love-language board' to help keep track of wild flowers, love notes and keys to her heart. . . 

Getting Started

There were a few more materials than normal because of the different things I wanted to do with the love board.  I went to Michael's and got all the materials which included the following
  • Cork Board (Purchased a pack of 4 12x12')
  • Medium Cloth Pins (one pack had about 15)
  • Pack of Craft Nails (it came in a packet of 1.5' 1' and .5' nails)
  • Paint 
  • Stencils
  • One small pine branch (about 1' or .5' in circumference)
In all, I paid about $20.00 for all the materials.  I would recommend buying everything but your cork board first, then use the receipt which gives you a 40% discount and purchase the $12.00 board.  

Step One

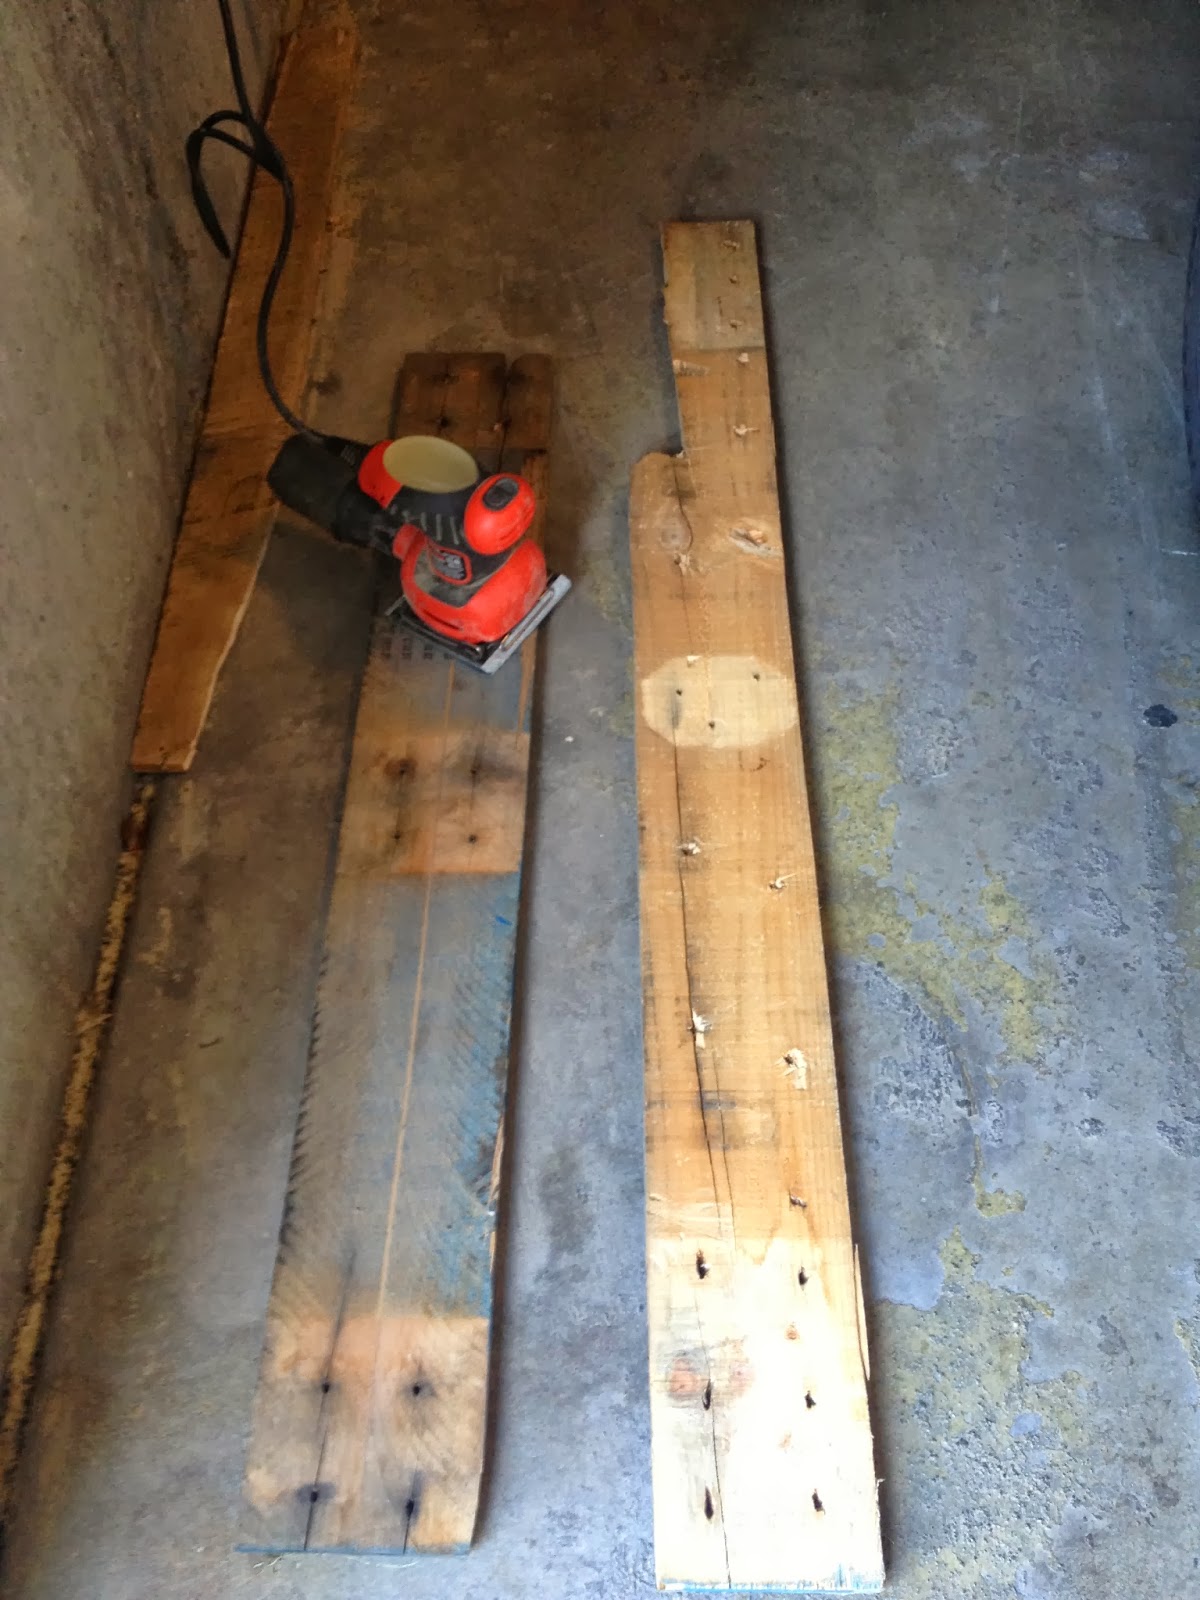
Choose your board- Before you get underway on your board, you want to make sure that you have a good sized board to work with.  I used a full length board that was about 3 feet long and 6 inches wide.  This will give you plenty of room to work in your cork board as well as some room for your clothe pins.  Sand down your board depending on how rough want your board.  I sanded mine to the point that it wouldn't give me slivers if I rubbed my hand across it, but you can do whatever the junk you want!

Step Two

Determine orientation of your board- I wish I would have thought of this before, but for this step you will want to determine which orientation you want for your board.  If you want it to hang parallel with your door, wall or wherever you hang it, you will want to make sure that the following steps agree with the orientation of your board.  This will make more sense in the following steps. 

Step Three

Add the cork board- Depending on how big you want your cork board to be (I had to make sure that mine was SUPER big due to the amount of love notes my fiancé receives) will determine how much space you'll need reserve for your board.  I double layered the cork board so the pins would only sink into the cork and not the wood.  Apply a few strips of Wood Glue like jelly on a PBJ to have the two cork boards stick together.  Apply a few more strips of glue on the back side of the board and then apply directly onto the board.  Put a nail in each corner of the cork board and also in the middle to keep the board secure on the wood 

Step Four

Paint your dreams- I used a stencil with butterflies and wild flowers because the love of my life is literally the human form of a wild flower.  Her natural beauty like a cloudless summer night, or happiness that spreads to all those around her, her gentle and tranquilizing scent or softness and grace are the pure personification of a wild flower.  Her spirit floats on the charity she feels for her fellowman like the air on the wings of a butterfly. After the paint dries, nail in a few nails either at a 45 degree angle or whatever will help keep keys up against the board.  

Step Five

Glue your clothe pins on- I used seven pins evenly spaced to hold wild flowers.  I applied a generous amount Wood Glue to the back of the pins to keep them firmly in place.  Determine how far from from the top you want your flowers to hang and then apply a clothe pin.  Continue to place your clothe pins from your designated height from the top of your board until you come to the nails in the center.  Allow plenty of time for the pins to dry on the board.  


Step Six


Make your push pins-
 To make my push pins, I went to a local park and cut of the branch of a Pine Tree.  It wasn't too thick, about the same diameter as a dime which worked perfectly with the nails.  I also used a PVC pipe cutter to clip little 1' clippings for the push pins.  After you have clipped a as many small pieces of pine as you desire, take a .5' nail and push it through the middle of the pine.  If your pine branch is fresh this process will be super easy, no hammer required. 


Step Seven


Hang your board- I nailed two nails towards the edges of my board so that a copper wire would pull against the nails supporting the board in place. Pretty simple...but if you need more ideas for this then I wish you all the best.


In hindsight, I wish that I would have made one board that could hang parallel (up and down verses sideways) with the door or on another wall.  This would save space and make the walls look more clean and space oriented.  My fiancé loved the board and although she doesn't use it the way I would love her to, she did put the spare key, two roses and my love notes on the board and has them in her room :)  As my father in law once told me, "A happy wife makes a happy life!" so true...

Saturday, October 12, 2013

Sneak Peak at Project #5

Project #5 "Love-Languages Board" 


Here's a look at what I will be posting for next weeks project!  Made this 'love-languages board' for my fiancé to help her keep track of her keys, notes and wild flowers.  She loved it...and I kinda wanted to take it back and use it for myself ;)

Friday, October 11, 2013

Project #4 DIY Dish Rack


My Own Dish Rack

Before I get started with instructions on my latest project, I have to share a few hilarious words.  I live with two of the best people in the world (come December 14th, I'll have the BEST roommate of course), my brother and best bud Luke.  My brother plays for the BYU Football team which is simply fantastic and my roommate Luke plays for the BYU co-ed dating team, some-what fantastic.  When friends for either roommate come over to our house, they almost always comment about the different crafts: dish-drying rack, grow box with fall foliage or the banan-A-frame. Comments from friend's of my brother are usually something like "uh, did your girlfriend make that?" to which I usually just make a mad dash to the bathroom.  Comments from Luke's lady friends are something like "Oh my gosh!!  Did you REALLY make those?!" . . . to which I make no reply.  The only comments I really care about are the ones from my fiancé, "That's great Taylor."  Just something to think about :) 

Getting Started

After working on my grow boxes (see below) I saw another project on Pinterest that I thought I would 'tailor' to my own needs.  Although dishes in our apartment are nothing as bad as other apartments I have been in (dishes so high that even poor fruit flies experience altitude sickness trying to fly to the top of the pile), we desperately needed a drying rack for our dishes.  

The materials for the dish rack were pretty basic, most of them I had already accumulated from past projects.
  • Mod Podge 
  • 3 ft dowels (I bought four dowels = plenty from Home Depot) 
  • Box of 1 3/4 (4.45 cm 'Grip Right' nails also from Home Depot)
  • Helmsman Water Repellant (two cans worked perfectly
Step One

If you have left over scrap wood from previous projects, use those.  If finding a new pallet and breaking it down, sanding your planks of wood and cutting them is required, then good for you.  I used the same wood from my other projects and found that two planks were plenty for the 1'x2' drying racks I made.  Before going on with the project, measure the length of the area you want to put your drying rack so it's a perfect fit. 

Step Two


After figuring out the dimensions for your drying rack, you'll need to drill holes through which your dowels will go in order to hold your dishes up right.  My first attempt at the drying rack left me with holes that were drilled in the center of the wood.  If you want your dishes to fall over then this is exactly what you should do, but if you want them to stand upright and positioned so they can really dry then drill holes about 1/2 inch from the top of your sides.   I drilled the holes with both planks on top of each other so that the dowels would line up perfectly and they did!  Small miracle :)   I drilled five holes from the back one inch apart and then I drilled an addition hole about .5 inches from the front so I could have a place for silverware etc.  
Step Three


After drilling your holes, you'll want to nail the box together.  I found it super helpful to nail one end piece to the side piece and then nail your two pieces together.  This probably makes no sense, but do whatever feels best ... as long it's legal.  Notice how there is no bottom?  I did this on purpose because I wanted to just have a towel under the box and not a piece of wood that could get moldy and gross.  

Step Four

When the box has been nailed together.  Coat each dowel with the Helmsman repellant.  This was an idea I had while watching water seep into the cement as a child in excruciating heat of St. George.  If you want your dishes to dry, and the dowels to keep from molding, then give them a good coat of the repellant.  When the dowels of been water-proofed, dip each end in Mod Podge and slide them through the holes, allowing time for the glue to dry.  

Step Five


When the repellant and Mod Podge have all dried, place your drying rack on top of a towel next to your sink!  It's just that easy!  

It would be a good idea to make sure you have the right size of drill for the dowels.  This will save you frustration when you attempt to put a dowel into a hole that is much to small.  I also found it helpful to wipe the box with some Pine Sol (on the outside of the box) to give it a nice scent and look after the box was dried.  


Saturday, October 5, 2013

Project #3 Pallet Project

"My first Pallet Project" 


While surfing around on Pinterest the past month, I kept coming across what were called "pallet projects" or basically projects that people were making from wood taken from old pallets.  They seemed fun enough and easy enough to try...so I 'tried' it out.

Choosing the Project

For my project, I decided to start with something easy.  It would have been awesome to build a sweet hide out, but seeing that I live in the apartments of P-town, there would be no where for me to put it.  I also thought about making a large grow box, but again- P-town problems.  Instead I went with a simple wooden box that I decided to make for our kitchen table that could have growing plants and fruits.  The idea came while reminiscing on my childhood home in St. George.  My mom aways had fresh mums in the center of the dinner table.  I loved the vibrant colors that changed week to week and the fragrance of the flowers and fresh feel each time I came home.  I figured imitating this same feel would be a great idea for my apartment filled with 3 young men.

Step One Breaking Down the Pallet

I had no idea going into this project that breaking down a pallet would be so difficult.  I found two big pallets (they each weighed about 80 pounds total) on the side of the road and carried them home.  Using a hammer, I literally beat the nails out of the wood because they had been nailed so deeply into the wood.  I had to sacrifice a few long boards, but I found that taking a screw driver and using it to push the nails back through the wood and then pulling them out with a hammer was most effective.

There is also another type of pallet, not as durable as the heavy pallets that I used, but definitely easier to take apart.  Using the same screw driver, I wedged it down the end of the long boards, just to the side s of the nails between the board and the risers (the 2x4ish boards that made the gap in-between the longer boards) to pull out the nails.  This was SO much faster and I had plenty of boards in no time.

Step Two Sanding the Boards

I used the same power sander that I used for my picture frame (Black and Decker baby!) and 60 grained paper.  I would recommend having ear phones in while sanding so you don't go deaf too.  I sanded one side of the board, the side that others would be seeing and feeling, really well so that it took out the stress marks and unwanted paint marks.  I also found that sanding the top and bottom of the boards was helpful to avoid slivers.

Step Three Measure Twice- Cut Once

For those who actually do read this blog, most likely my mom and professor, you most likely live in a large home with a gigantic dining table.  In my small apartment, our humble table is about big enough to fit one person with a small bowl of cereal.  Because of the size of our table, my box that I made wasn't intended to be anything big or spectacular.  I wanted it to be big enough for its function, but small enough to look good.  The length was 2 feet and and I could to do the width the same as one of the normal boards.  Super fancy right?

Step Four Nails

The wood used for pallets is pretty thin which means nails can possibly split the wood if you aren't careful.  This can be prevented if you nail the board while it is lying on flat cement and then, once the nail has almost penetrated through the first piece of wood, place it on the other piece of wood and then finish penetrating.  I  used a total of 8 nails; 4 for the bottom and 2 for each side.

Step Five Stain

Putting finish on your project is completely up to you.  I made a total of four boxes so that I could experiment with all the stains and without stains.  The stain can give it a beautiful look which you may want.  I would recommend going to the Home Depot (please bless I can register for my wedding there...please bless) and find a stain that matches your cupboards and other wood work in your home.  However, I discovered that I loved the natural look and smell of the sanded wood, wiped with a damp rag, for the finished look.

What I wish I would have known 

I found it helpful to listen to classical music while completing this project.  My patience at different various times quickly ran out, especially while trying to take out the boards from the pallets.  There is something about classical music, Bach, Vivaldi, Chopan and Debussy that helps calm my nerves.  It was also helpful to use smaller nails (3/5) that were skinnier to help avoid cracking the wood.  Comment if you have any tips or things you found helpful or if you want to know when I'm getting married!


Wednesday, September 25, 2013

Restoring an old picture frame

Project #2

It could be because I’m engaged, or maybe just because I like to try things I see, but the project for this was restoring/remodeling/redoing a picture frame.   If I told someone that I did this project strictly for the fact that it looked fun that would be a complete lie- it wasn’t all that fun or challenging.  The real reason why I chose this project?  Because I wanted to buy some power tools.

Before I go on to explain the steps of this project and whether or not it turned out the way it is claimed to turn out, let me share a little story.  I have been working at a home this past summer doing yard work/gardening/landscaping (whatever sounds most professional works fine) when I started to realize how many awesome big boy toys the owner of the house had.  Realizing that I’m in the position where I’m making some money (emphasis on “some”) I figured that I too should begin my own supply of big boy toys.  I figured that the best place for buying this ‘tools’ would be Home Depot or a store similar to that right?  Wrong.  Completely wrong.  If you’re young and not all that rich like me, the place you need/should go is the pawn shop.  That place is literally like going into the garage of all my neighbors in my hometown and having anything I could ever want.  You need a picture of the Beetles?  They’ve got it.  Need a gun?  They’ve got it.  How about an alarm clock, camera, toilet seat,  stereo, staple gun, or power sander?  They’ve got it.  What about a wedding ring?  They’ve got it and I actually bought one that my fiancé is wearing right now, but that’s another story for a different blog.  Point of the story- if you need inexpensive tools and are fine that they have been used, go to the pawn shop my friend!

Now, back to the steps of how to make your dull and ridiculous frame look fresh and new. 

Getting Started

To get started I went down to dumpster and found this old picture frame.  I actually knew the previous owner of it…don’t think that ‘they’ know I have it!  I got the sander from the pawn shop and some sand paper from the Home Depot

·      Old picture frame- free
·      Hand power sander $25.00
·      Sandpaper $3.96 (for a sheet of three)

Step 1

Before you can get started on this project you need to find a frame that is made of wood and has been painted.  I prefer a frame that is flat and not curvy (i.e. a router has been used to make the sides) so that a normal sander can easily remove the paint.


Step 2

While keeping the frame firmly on the ground (I crouched on the ground and held it down with one of my feet) sand the paint of the frame.  It takes a minute or two to break through the first part of the paint but once it comes off the rest of the paint follows along with some effort.   When the paint has come off and you are left with only the bare wood exposed, make sure that you are sanding along with direction of the grain instead of cross grained.  This will help the wood keep a good look.

Step 3

When the sanding is complete, use any type of stain you choose.  There are lighter stains that look good on lighter colored wood, often leaving the natural coloring of the wood, or you can go with a darker stain to match the colors of your cabinets or furniture etc. 


Helpful Hints

I found it helpful to use a 60-grained sand paper to easily and quickly remove the paint.  Anything higher than this grain will probably leave you sanding your frame for a longer time, but will result in the sanded frame feeling more smooth than the 60-grain piece.  

Canvas Picture Follow Up

Canvas Picture Follow Up

Because I had left over materials from my first canvas project (see below) I decided to try the project a second time.  I wish I had taken pictures of the project to post onto the blog, but because it turned out so well I decided to send the two pictures to my grandpa.  Needless to say- he loved it.

What I did Different

After completing the canvas picture for the first time, I figured it was so ugly that I could NEVER give it to my girlfriend.  However,  I gave the picture of myself to my younger who has proudly hung it on his wall in his room.  A great addition to a great room.  This time around I decided to have a picture printed from Walgreens instead of printing it from a printer.  This was super easy using the 'picstitch' app which allows you to print any size photo directly from your iPhone to Walgreens.  Using this glossy picture instead of the paper printed picture made a huge difference.

The steps from this point are basically the same; apply a layer of mod podge to your canvas and then the picture.  Smooth the picture evenly throughout (best to do this with the picture lying flat on the carpet and pressing from the back side of the picture- this will avoid getting nasty dirty finger prints all over your picture) and then let the picture dry.  The time needed for your picture to dry depends on how big your canvas is (I used a 5'7' and it took about 330 seconds or 5 and a half minutes) but note that it dries fairly quick.  After the mod podge has dried, apply another layer over the picture.  Your picture will look glossy but I promise that it will dry and look fine.  There will be a light film over the picture, but this will protect the picture from getting dirty.

Lesson Learned

It's always better to buy too much than too little.  I have used the paints and the canvas  that I purchased for other projects I've started....more to come :)

PinPower!

Tuesday, September 10, 2013

DIY Canvas Picture

Project No. 1


I decided to try something that's been pretty popular on Pinterest for the past month or so. Basically it's a picture that is displayed on a canvas frame.  I've seen them in real life where the picture is printed right onto the canvas itself, but those projects from Shutterfly and other usually cost around $150 and up.  I don't have that money to just through around so doing something for $25 is much more attractive. 

Getting Started

To get started  I went to Michael's craft store and got all the supplies that were listed on the link from Pinterest.  Here's a break down of the costs
  • 5' 7' canvas $2.99 (40% discount)
  • Mod Podge $8.99 (16 oz)
  • Foam Brush .99 (2 in. brush)
  • Paint $1.50 (2x total at .69 ea

Step 1

You want to make sure that your picture and the canvas are the same size. Computers should have printing sizes that are very close to the size of the canvas but if they aren't then trim the picture a bit so that it will fit on the canvas.  

Step 2

Applying the mod podge was easy and straight forward.  Feel free to just dip the brush into the jar of sticky goodness and apply it straight onto the canvas.  I was worried it would dry extremely fast, but since the canvas wasn't very big I didn't have any problems at all.  

Step 3

Putting the picture on the canvas we RETARDED!  I thought that if I align the top of the picture with the canvas then everything would line up automatically...wrong.  I should have lined both side and top but hey, this was just a practice round.  Make sure that you get the side and the top aligned with the picture and canvas and slowly lower the rest of the picture onto the canvas.  You will want to press the picture onto the canvas, but I would recommend that you start from the middle and work your way towards the edges. 

Step 4

After the picture has dried onto the canvas (I let mine sit for 15 minutes) you can paint the sides of the canvas any color your heart desires. If beige is your thing, go for it.  If it's azure, the sky is the limit.  If it's red, let your heart bleed itself dry. Use the same foam brush to apply the paint and have it.  I held onto the inside of the canvas so that I could get to all sides then used the straight edge make sure that all lines were straight (with the picture) and even coated throughout.  

Review

Overall, the project is pretty simple.  The biggest challenge that I faced was the actual printing of the material (they recommend using tissue paper but I would say.....better off printing one from Walgreens etc) so that it looked good and professional.  This example has just a normal color print but I will try again this weekend with a glossy black and white and another attempt with different types of paper.  Well worth your time for a fun date, family project or snowed-in activity!